Here’s What You Need to Consider Before Tackling This Project Your self
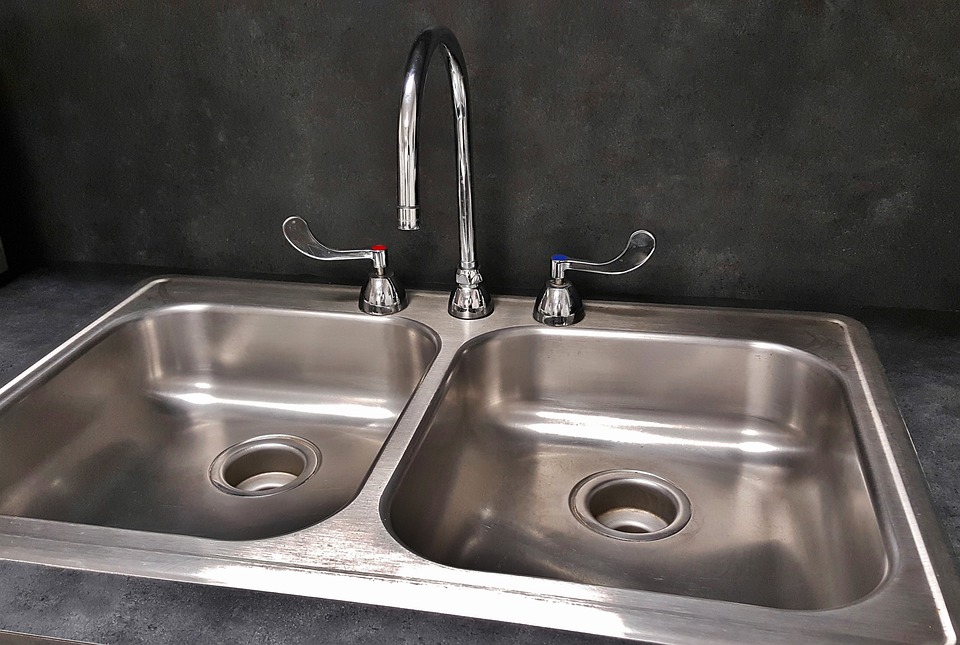
Tips On How To Replace A Kitchen Faucet
The hardest part of replacing kitchen faucets is removing and replacing the old one. There is always a chance that unexpected issue will pop up and could be anything from corroded pipes to poor access to fittings to difficult-to-reach nuts. Other than that, installing a new faucet shouldn’t be a problem.
Actually, all you need to do is follow the directions that come with a new faucet. Apart from any unforeseen issues arising, you should be washing up under a new faucet within an hour. In this piece, we will be walking you through the basic replacement process and how to handle the toughest parts of the project.
It is advisable that you get all the needed parts at your local hardware store beforehand. Chances are you will need to make several trips to the store for different parts as you get into this project if its your first time.
Here’s a few items to consider before heading over to the supplier …
Shutoff Valves: Before shopping for a new faucet (read the “Selecting a Faucet” article at the end of this article on how to replace a faucet), look under your sink and see if any shutoff valves feed your faucet. If you do not see any shutoff valves, then add them. However, if they are there, confirm that they are in good, working condition by turning on your faucet then shut off the valves. If it still drips, consider installing new ones. Chances are you have half-inch copper supply lines. If that is the case, then add solderless compression-fitting valves to your shopping list. If that’s not the case, buy valves that are compatible with your piping.
Piping and Tubing: The next thing you need to do is to measure existing supply tubes and purchase new stainless-steel-sleeved supply tubes. These tubes are designed to provide rupture-free service for many years and can be bent around obstacles without cracking or creating tension.
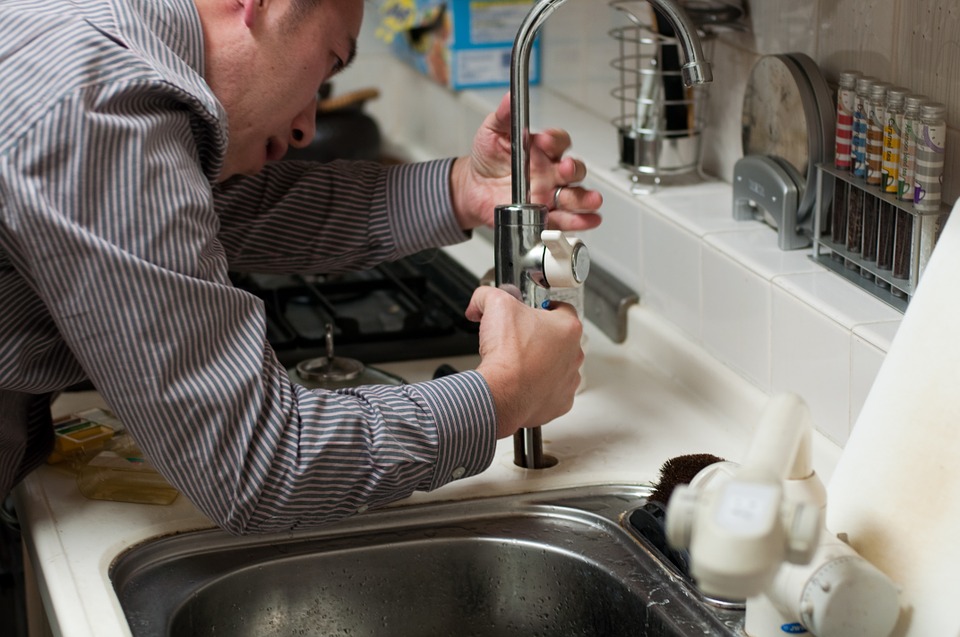
Basin Wrench: This is a special wrench needed to easily access the fixture nuts up in behind the sink. Getting a normal wrench up there may not be possible. These wrenches are not expensive and should run you about $15. This wrench, though a bit weird, is specifically made for removing and installing those hard to reach fasteners that were used to clamp older faucet systems to the sink.
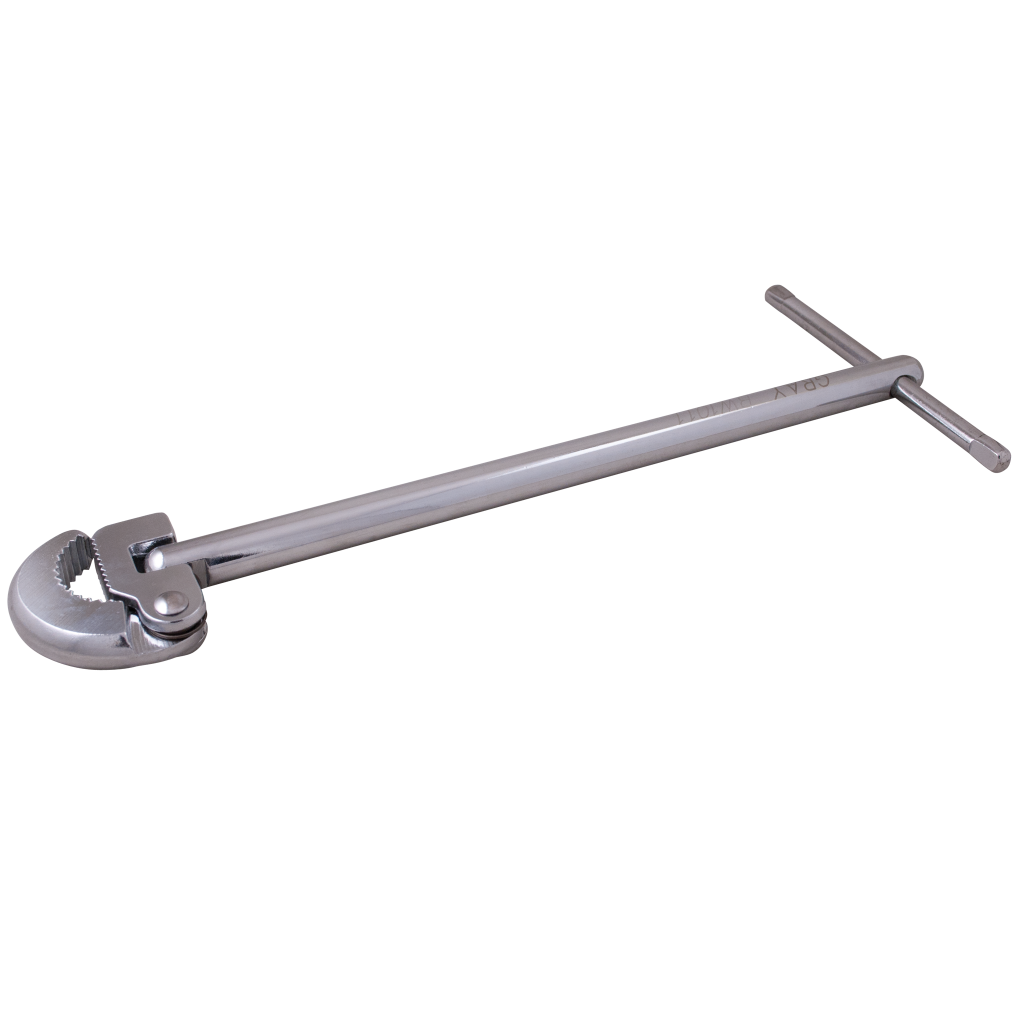
Modern faucets now mostly come with plastic style Wing Nuts with larger fittings that can be tightened and loosened by hand. Basin wrenches have spring-loaded hinged jaws (see above) that pivot, allowing you to either loosen or tighten nuts located in very tight spaces.
Pump Pliers or Pipe Wrench: If you have to remove a drain line to access your faucet, then get pump pliers, often referred to as ‘channel locks’, or a pipe wrench. If there are copper tubes that need to be cut, purchase a conventional tubing cutter. However, if the copper supply line is a couple of inches to the rear of your cabinet, then consider getting a special ‘mini-tube cutter’. You will also need open-end wrenches for hooking up and disconnecting the water lines.
Before disconnecting your drain lines, make a sketch or take a photo of the layout. This will be of great help when putting things back together.

Once you have pulled out all the buckets, old vases, and cleansers from under your sink, lie under there and look to see if the faucet can be easily accessed. If you cannot, it is time to start taking things that are blocking your path apart.
You will likely find that the main obstacles under there are the P-traps and pipes that drain your sink. Do not be afraid of pulling them out and do not be afraid of replacing them with new ones. If your drain lines are the older, chrome-plated ones, there is a likelihood that the pipe walls are so corroded that they will crush under the pressure of the jaws of slip-joint pliers or pipe wrench. After you’ve removed them, throw the parts in a container for exact matching at the store. If the drain parts are made of plastic, be very careful when removing them. Chances are you will still be able to use them again.
Sometimes, garbage disposer can weigh up to 20 lbs. Roadblock? Do not be discouraged. Removing it is quite simple. Reinstall it once the faucet has been installed. Unplug your disposer and pull it out of your cabinet to get it out of your way. If it is hard-wired, turn off the circuit breaker controlling the disposer, disconnect it from your sink and set it to the side of your cabinet and leave the electrical cables connected.
The first thing you need to do to remove the old faucet is to disconnect it from the water supply line. If there aren’t any shutoff valves and your water pipes are directly connected to the faucet’s supply lines, or if you are replacing a defective valve, then make sure you turn off your home’s main water service valve and cut the pipes below the old connections using a tube cutter or hacksaw.
It is imperative that you have the new valves closed before turning water service valve back on. Once you have disconnected the water lines, use your basin wrench, loosen and remove the old faucet.
Sometimes, despite all efforts, it is impossible to loosen old faucet nuts. But that shouldn’t bother you. Here is a trick. Spray the threads with some penetrating oil such as WD40, give it a minute or two, and try it again. Now, if that does not do it, you’ll unfortunately need to pull your sink off the counter so you have access to the nuts. It is not that hard to do. Loosen all the screws beneath the sink rim for clamp-down sinks, or cut the caulking between the countertop and the actual sink itself with a knife then lift it out. By doing so, you should be able to access the hard-to-unscrew nuts with a pipe wrench or locking pliers to free the faucet.
Follow the installation directions that come with the new faucet and remount your sink (with your new faucet already installed) then hook up all water lines.
Selecting A Faucet
When buying a faucet, remember the old saying, “you get what you pay for”. Faucets under $100 are usually substandard and are probably made using chrome-plated plastic, and their valves and seals wear out much faster. While they are okay for light use, the cannot withstand frequent use. Faucets within the $100 range and up are generally made using solid brass and have durable plating, and their washer-less controls offer leak-free, long-term service. There are some that even come with lifetime warranties. The more expensive a faucet, the better the quality. However, if you buy a faucet worth more than $200, then you probably are paying for finish and style.
When shopping for a faucet, stick with well-known brands; that way, finding replacement parts, should you ever require them, will be easier.
Tools You Will Need When Replacing a Kitchen Faucet
When handling a DIY kitchen faucet replacement project, it is vital that you have all the necessary tools ready to save time and to avoid frustration. You will need:
- An adjustable wrench
- A 4-in-1 screwdriver
- Handsaw
- Hammer
- Basin wrench
- Slip joint pliers
- Wrench set
- Pipe wrench
Materials You Will Need To Replace Your Kitchen Faucet
To avoid making last-minute trips to the hardware store, make sure that you have all the required materials at hand before you start replacing your kitchen faucet. Here is a list of a few things you may need:
- Braided stainless-steel supply tubes
- P-trap
- 150 grit
- Your new faucet
- Shut-off valves
- Sandpaper or sand cloth